Pear, Cucumber & Dill Salsa – Recipe

Necessity is the mother of invention right? This recipe would definitely fit with that – it’s the best thing I’ve invented this week, and they were virtually the only edible fresh ingredients we had in the house at lunchtime. I was really pleased with the flavour combo. We had it with (leftover) potato and stilton cakes for a light lunch, but it could be built up into a nice warm salad with some boiled new potatoes, smoked mackerel and perhaps some toasted walnuts, or it would make a nice bed for some grilled sea bass or other fillet’o’fish to sit on.

Ingredients

Conference pear – 1 medium size,  cored and cubed (0.5cm cubes). Skin on, or off for more refined look.

Cucumber – 4 inches,  cubed (0.5cm cubes). Skin on, or off for more refined look.

Dill – 2 tablespoons finely chopped leaves

Runny honey – 1 tsp

Cider vinegar – 1 tsp

Extra virgin olive oil – 1 tbsp

Salt and pepper to taste

Method

Err, combine it in a bowl.


Recipe – aromatic winter vegetable soup

aromatic winter vegetable soupThis is my 200th post, seems OK to mark that with a recipe. Today’s been a bit of a tidy-up and use-up day, so after spending the morning clearing up the garden to get it ready for spring planting, I headed inside to see what the fridge could muster after a few days away. Not much really was the answer, but I had a few veggies that needed using and the forage in the garden reminded me that I had some cavolo nero out there that was looking great, and would make a good garnish for a chunky soup. Jane and I are both feeling a bit under the weather so a fragrant and spicy sinus-clearing soup was in order. I didn’t have any onions but have included them in the recipe, as it definitely would have benefited from a bit of lasting backbone as it slipped down the throat. I also realise that sweet potatoes aren’t really an English winter veg, but they really helped this dish, giving it a little sweetness that lightened the whole thing.

Ingredients (serves 4):
50g unsalted butter
1 medium onion – finely diced
3 cloves garlic – finely chopped
2 small sweet potatoes – 1.5cm cubes diced
1 small swede – 1 cm cubes
1 green chilli – finely chopped
Cinnamon stick
2 bay leaves
1 Star anise
1 thread of mace
About 20 sprouts – outer leaves stripped and halved
10 small shoots of cavolo nero (black kale) – cleaned and left whole

Method:
Put a medium-large saucepan on a medium heat, and melt the butter. Add the onions, sweet potato, garlic, swede, chilli, all the aromatics, and a decent pinch of salt, and turn the heat down to low. Stir occasionally, ensuring nothing sticks or burns, for about 20 minutes, until the swede and sweet potato is starting to tenderise. Add 600ml of boiled water from the kettle and return the heat to medium. After 5 minutes add the sprouts and simmer for 6-7 minutes. Remove the cinnamon stick, star anise bay leaves and mace, and mash the remaining soup lightly with a potato masher to thicken it. Add the cavolo nero, taste and season, and cook for a further 5 minutes. As there was no bread in the bread bin on returning home from being away, I knocked up some quick soda bread to go with it. It tasted wonderful, had a great texture and was just what we needed after a morning in the garden.

Rhubarb and Ginger Cake – recipe

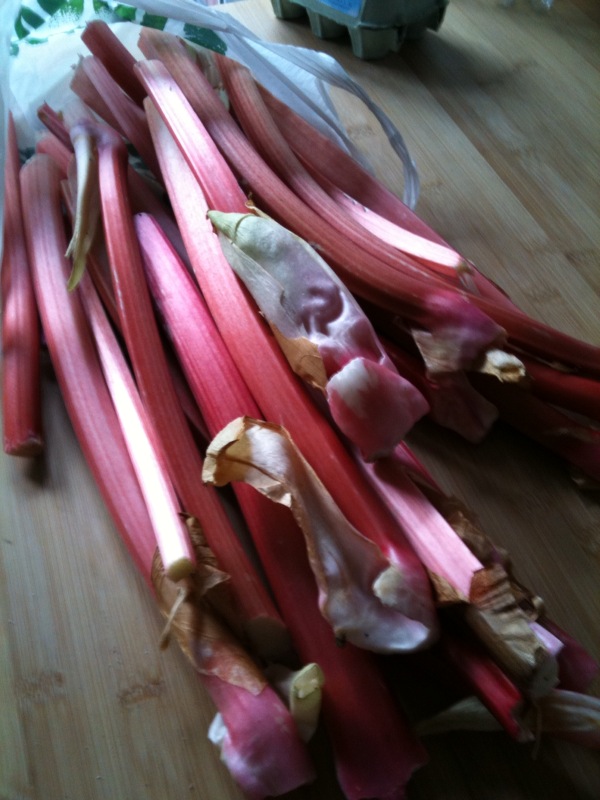
It’s gone a bit rhubarb crazy at Loaf HQ recently. We’ve been harvesting the rhubarb at the allotment, some friends gave us some from their allotment rhubarb as a dinner/borrowing our spare room gift, and I did my first food-barter of the year with local allotment-holder Rob Macpherson, swapping a loaf of Kamut sourdough bread for a load of gorgeous forced rhubarb (see pic below). I softened the bartered rhubarb with brown sugar, orange zest, cinnamon, bay, nutmeg, mace, and star anise, and served it with duck breast and rosemary potatoes (sorry no pic) – very, very nice! Incidentally see the pic below showing the difference in colour between normal and forced rhubarb, amazing!

forced rhubarb2
Rob's forced rhubarb
forced rhubarb
Forced rhubarb left, normal right

Anyway, we still have lots of rhubarb knocking around and today Jane was demanding cake, so I decided to attempt a rhubarb and ginger cake, and here’s the recipe:

Ingredients:

4 chunky sticks rhubarb (I used normal, be forced would be ideal)
50g brown sugar
Splash of orange juice
Grated zest of 1 orange
1 tsp ginger powder
150g unsalted butter at room temp
150g caster sugar
3 medium eggs at room temp
200g self raising flour
60g wholemeal flour
1tsp baking powder

Method:

Preheat the oven to 170C/gas mark 4. Chop the rhubarb into one inch chunks and put into a non-stick pan, sprinkle over the ginger powder, orange zest and brown sugar and add a spalsh of orange juice. Cook over a medium heat for 7-10 minutes until the chunks just soften, but don’t totally fall apart.
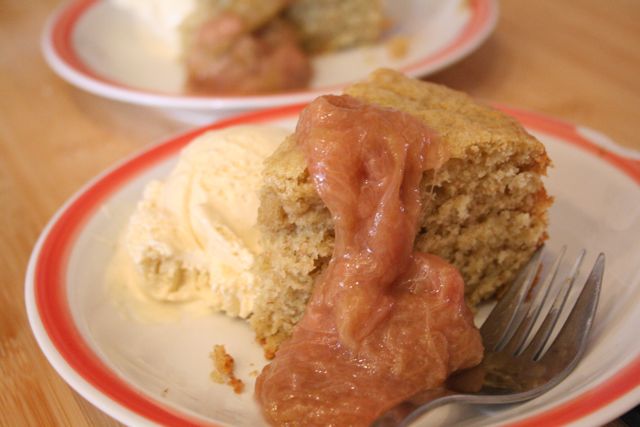
Whilst it’s cooking beat together the butter and sugar in a bowl with an electric whisk until thoroughly creamed. Add the eggs and beat on full power for three minutes. Now add the flours, baking powder and 200g of the cooked rhubarb (save the rest as a sauce), and gently fold together with a spatula. Pour into a greased 20cm round cake tin and bake in the preheated oven for 40-45 mins. Allow to cool on a wire rack and then serve with vanilla ice cream and some of the softened rhubarb – delish!!

rhubarb and ginger cake

Ragley Pork and Pure UBU Sausages – the verdict

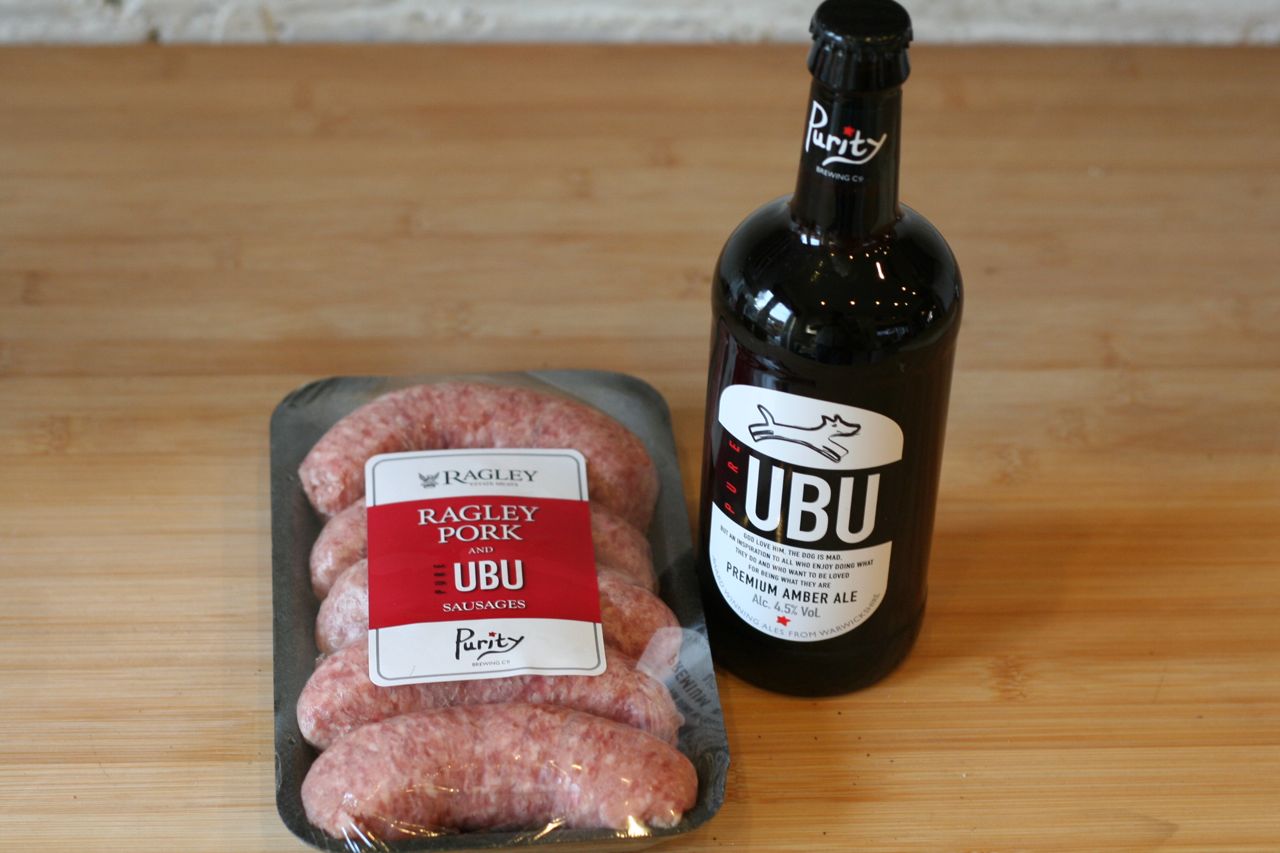
IMG_5452Running a food website has it’s perks, as I found out this week after a call from a PR company representing Purity Brewing Co and Ragley Estate Meats, inviting me to sample a brand new sausage made by Ragley Estate Meats, using Purity’s Pure UBU ale. Now, I’m not one to refuse free food so I was excited to try this exclusive Warwickshire collaboration. I’m also though, not one to have my food messed around with too much – I don’t like sun dried tomatoes in my bread, herbs in my tinned tomatoes, or chilli in my cheese (and definitely not my chocolate), so would I approve of beer in my sausages? Maybe more importantly, how the heck do they get beer into sausages? I was informed that the beer is heated, and the steam from the beer infuses the meat. Phew, that’s that question sorted then.

So, what to cook to allow me to properly test these sausages? It had to be simple to allow the sausages to be the main event – bangers and mash seemed the obvious choice. However when you’ve got posh sausages, I think it’s worth poshing it up a bit, so I put an Italian twist on bangers and mash and went for potato gnocchi with sausages and a Pure UBU gravy. Here’s the recipe (serves 2):

For the gnocchi

400g cooked and thoroughly mashed or riced potatoes (waxy varieties are good, I used Balfour and added a bay leaf and salt to the cooking water)
100g ’00’ pasta flour (plain flour will do)
1 egg – whisked
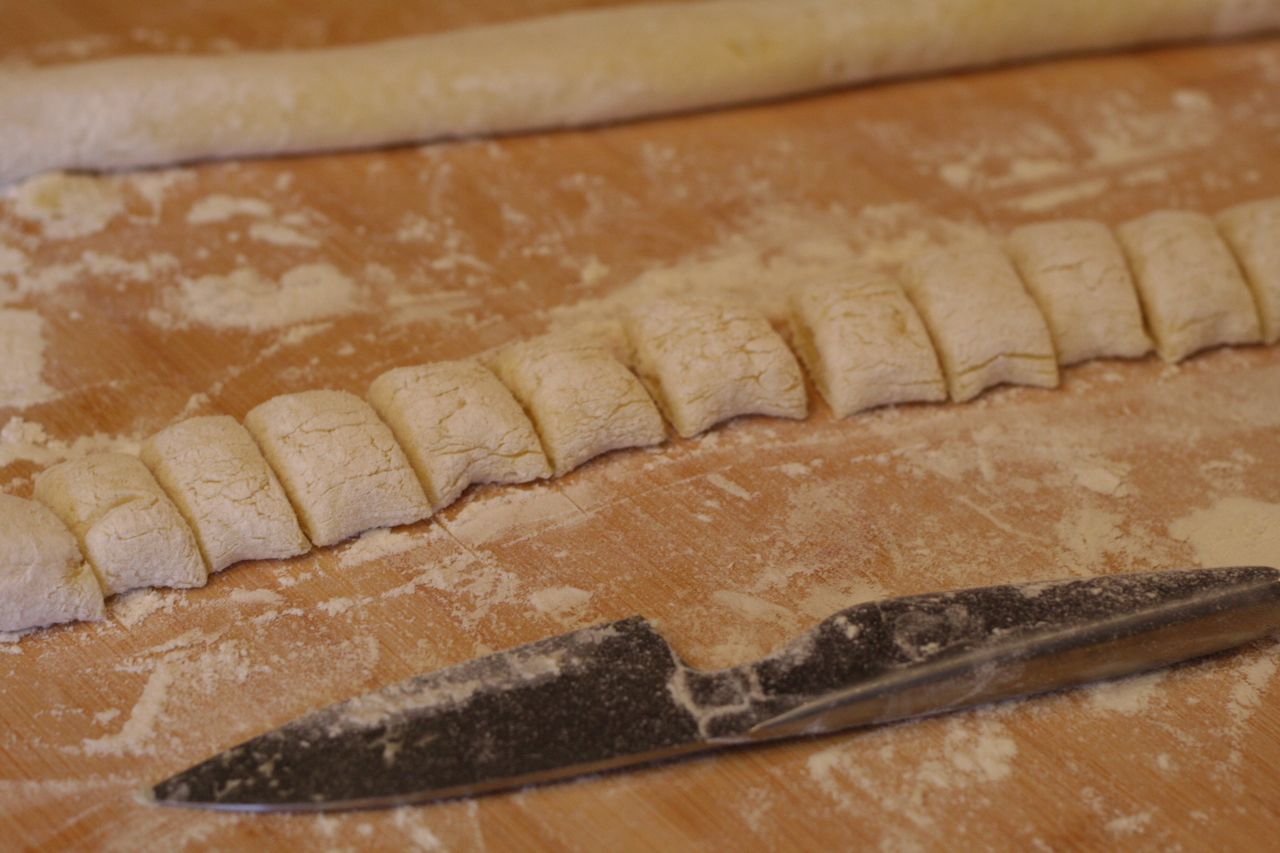
IMG_5462Ensuring the potatoes have cooled from cooking, combine all the ingredients and knead lightly for a minute. Divide into three and roll each out with your hands on a heavily floured work surface into a long sausage that is about 12mm thick. Then, using a knife divide into half inch chunks, and put aside on a floured plate until you need them.

For the sausages

I used 3 sausages for 2 people, but feel free to have more or less. Fry them in a little oil on a low heat for 15-20 minutes until just cooked through.

For the gravy and assembly

30g unsalted butter
60g Pure UBU ale
1 small handful of good grated parmesan (I used 22-month aged)
Salt and Pepper
Ground elder – 1 tablespoon, finely chopped (replace for chives or parsley if you like)
Edible wildflowers to garnish (I used dandelion and lesser celandine)

When the sausages are cooked, remove to a board to rest for a couple of minutes, then slice diagonally into nice chunks. Heat a large pan of water to a rolling boil for the gnocchi. Warm up the beer to just below boiling point in a pan. Prepare to get a bit manic, the next few things need to all happen within about 3 minutes flat! Scrape the frying pan used for the sausages clean and add to it the unsalted butter on a medium heat until it’s foaming. Add to this the warmed beer, and allow the bubbling to emulsify it. Quickly add the gnocchi to the boiling water. Return to the sauce and add the parmesan and stir to distribute throughout the gravy, and season with salt, pepper, and chopped ground elder. Turn down to a low heat. After the gnocchi has had about 2 minutes, it will float to the surface – it is done, drain the water off through a sieve. Now divide the gnocchi and the sausage chunks between two plates, spoon over the sauce and garnish with wildflowers or more chopped herbs, and freshly ground black pepper. Bon Appetit!

IMG_5463

The Verdict

The dish was fabulous, the gnocchi was perfectly tender and tasty and the gravy was malty with a hint of bitterness, offset by the freshness of the ground elder. As for the sausages, they were very good – clearly a high pork content (66% according to the packet), very well seasoned, and a deep, rich character from the malt and hops of the beer. Had I not known there was ale in there, I’m not sure I would have been able to detect it, but I’m not sure that’s a bad thing. Overall, it’s a good product, and if you can buy it locally, it’s a good choice for a rich, tasty pork sausage to put centre stage in a posh sausage dish. If you’d like to try for yourself, they’re being formerly launched tomorrow, Saturday 24th April, at Alcester Food Festival. Sadly I can’t be there, although I was asked to do a stall, but if you’re in the neighbourhood, check it out, it should be a great day.

Sauteed Savoy Cabbage with Hazelnuts and Cranberries – Recipe

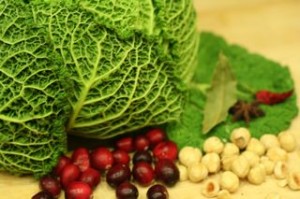
sauteed savoy ingredientsIf you’re anything like me, there is almost always a stray cabbage loitering about at the back of the fridge, looking thoroughly rejected as all the other veg get hoisted away day after day to be made into sumptuous treats and simple suppers. Well over the years of being committed to a veg box scheme, I like to think I’ve become a dab hand at using it up and making cabbage interesting- my main rule is that I almost never boil it! My latest recipe is to simply sautee it in butter with cranberries, garlic, thyme, and chilli, and add a splosh of nice oil to dress it as you serve it with filled pasta – delicious!

Ingredients (serves 2)

Whole hazelnuts – 2 tbsp
Unsalted butter – about 30g, cubed
1/2 savoy cabbage – the outer half (about 8-10 leaves, keep the heart for roasting!).1 bay leaf
1 star anise
1 clove garlic – finely chopped
1/2 dried red chilli – finely chopped
Few sprigs of thyme – stripped and finely chopped
Small handful of cranberries
Salt and pepper to taste
Walnut oil (or good rapeseed or olive oil)
Parmesan

Method

First lightly crush the hazelnuts in a pestle and mortar, aiming to half or quarter them. Pour these into a medium-hot, dry, non-stick pan to toast for a couple of minutes, tossing frequently. When lightly toasted, set them aside in a bowl. Now put the pan back on the heat, and add the unsalted butter, and after a minute the bay leaf, star anise, and savoy cabbage that you have washed and finely shredded. Sautee for a minute, before adding the garlic, thyme and chilli.

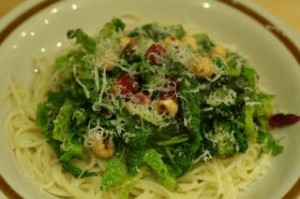
sauteed savoy
Sauteed Savoy served with spaghetti - nowhere near as good as with filled pasta!

Stir, turn the heat down a fraction to medium-low and if you’re pan has a lid, put it on (if not, improvise). After a couple of minutes add a tablespoon of water and replace the lid quickly. After a further couple of minutes, remove the lid, and add the cranberries. When the cranberries burst open, turn off the heat. Serve with filled pasta, a good dousing of walnut oil, grated parmesan, and the toasted hazelnut pieces.

Lemon Curd – Recipe

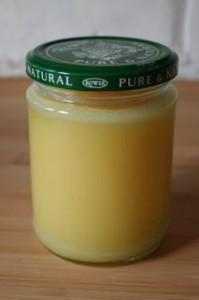
lemon curdAt my recent festive breads course, I had a load of lemons leftover from grating off the zest for the ‘flowerpot panettone’. I asked around for ideas of how to use them, and one clever student piped up with the idea of lemon curd. Seeing as i needed some last minute christmas prezzies for family etc, it was the perfect solution. My hens provided the eggs so all I had to buy was butter and sugar – therefore very cheap presents! I know it’s too late for you to make presents, but it’s still worth giving this a shot, especially if you’ve never done any preserving before, as it’s a pretty easy method. The recpe was inspired by Pam Corbin’s River Cottage handbook on preserving, which is well worth investing in. This recipes makes 3-4 1lb jam jars.

Ingredients:

Juice of 4-5 lemons (about 275ml)
Finely grated zest of 2 lemons
450g granulated sugar
125g unsalted butter
5 large beaten eggs

Method:

Add the lemon juice, zest, butter, and sugar to a stainless steel or glass bowl over a pan of boiling water. Heat slowly, stirring until the butter melts, then immediately add the eggs through a sieve (if you have a jam thermometer make sure the mixture is no hotter than 60C when you do this). Stir over a gentle heat for 10 minutes until the mixture is thick and glossy (at about 83C), and coats the back of a wooden spoon. Don’t let it get hot enough to boil. Pour this into warm, sterilized jam jars, and seal immediately. It will set as it cools. Tie a ribbon round it – Voila!

Roasted Uchiki Kuri Squash with Chilli, Rosemary & Garlic – recipe

Squash
Photo by Jane Baker / greensnapperphotography.com

I had a great time at my first 24 Carrots Farmers Market in Birmingham’s Jewellery Quarter on Saturday, it’s only been going since July, but it’s already a decent size and was still fairly busy when I arrived at 2pm. I quite like a market when it’s starting to calm down after the midday buzz, it gives you plenty of time to chat to the producers themselves, and often literally ‘shake the hand that feeds you’. I had a good hour at the market chatting to Kiss Me Cupcakes, Holly and the Ivy, the Big Pan Man, Brynmawr Farm and the 24 Carrots organisers too. I also had a brief chat to Hopesay Glebe organic farm, near Craven Arms in Shropshire (sadly just outside our 40 mile ‘local to Birmingham’ radius). The farmer (sorry didn’t catch his name) sold me a beautiful onion squash, otherwise known as uchiki kiri squash, with a glint in his eye. He described to me it’s soft edible skin, sweet flavour (not dissimilar to sweet potato apparently), and chestnutty earthiness, with the pride of a man that remembers the very day he planted it’s seed in the earth. On his recommendation, I decided to try my best to bring out the sweetness and nutty qualities by roasting it with some complementary flavours. After a muddle around in the store cupboard and garden, I lumped for some dried rosemary (from our sadly departed rosemary bush), last-of-the-season fresh chilli, garlic, some pine nuts and finally pumpkin seeds (to remind me from whence this beauty came). Here’s what I did (serves six as a side dish/accompaniment):

Ingredients:

Extra virgin olive oil

1 large uchiki kiri (onion) squash, skin on, seeds removed, cut into 1-inch thick half-moons (requires a sharp knife and a strong arm)

2 small red chillies – finely chopped, seeds and all

3 cloves garlic – finely chopped

Tablespoon of dried rosemary

Tablespoon of pine nuts

Tablespoon of pumpkin seeds

Salt and pepper to taste

Method:

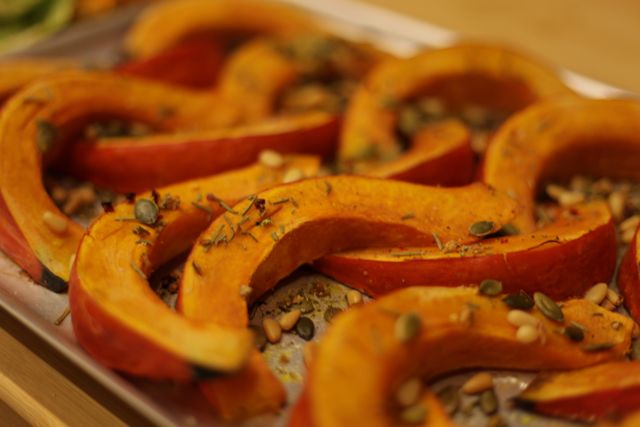
Preheat your oven to gas mark 9 (240C). Drizzle a decent layer of olive oil all over a large flat baking tray. Lay out your squash segments on this, avoiding piling them up on each other too much, and drizzle a bit more oil on top of them – don’t be stingy, this squash absorbs a fair bit of oil, and can dry out if you don’t give it enough to drink. Dash all your other ingredients liberally across the tray, and rub them in a little to the squash segments. Place the tray in the hot oven for for 45-55 minutes until tender to the knife-prick and starting to caramelise round the edges. I served it with a simple herby wholemeal cous-cous accompaniment, which worked well as a simple supper. I also used the leftovers to make a risotto that was utterly oozy and irresistable, with a beautiful saffron colour.

Nettle and Cobnut Pesto – recipe

This is a great wildfood recipe for this time of year, pick the freshest looking top four leaves from the stingers, gloves on, and make sure you pick above dog-weeing height if you’re picking in the city like we were (canal towpath). If you can find a hazel tree (there’s one on Lifford Lane in Cotteridge) then you can get the cobnuts for free too, but if not check out Augernik Fruit Farm at either Kings Norton or Moseley Farmers Market, who are selling great ones at the moment. This recipe makes a decent tubful.

pesto in the makingIngredients

100g (shell on) cobnuts

150g stinging nettle tops (about half a carrier bag)

1-2 cloves garlic

50g grated parmesan

80ml extra virgin olive oil (change amount to get desired texture)

salt and pepper

Method

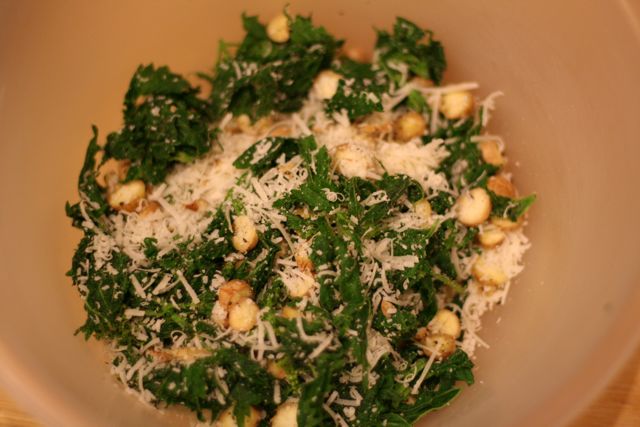
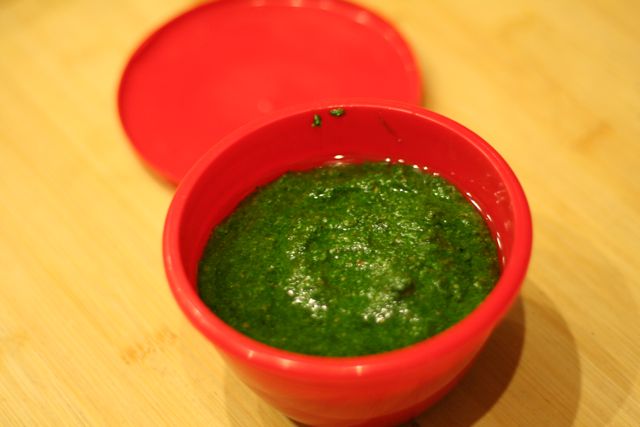
Dunk your nettles in a deep sink/bowl of cold water and stir round with a wooden spoon to give them a rough wash. Scoop out, and add them straight to a pan of boiling water for 60 seconds to blanch them. Scoop them out and add to fresh iced water to stop them cooking and retain their vibrant colour. After a minute, scoop them out with your hands (they’ll have lost their sting by now) and ring out all the moisture you can. Chop roughly, and put in a blender/food processer. De-shell the cobnuts with a nutcracker, chop roughly and add these to the blender. Chop the garlic roughly and add this too, along with the parmesan. Add a tiny drizzle of olive oil, and whizz on max for 30 seconds. Then whizz more gently adding the remaining oil slowly, until you reach the desired consistency. Taste and season. Store in an airtight container, with a layer of pure oil over the top, for up to 4 days in the fridge.

Nettle and Cobnut Pesto

Damson Sorbet – Recipe

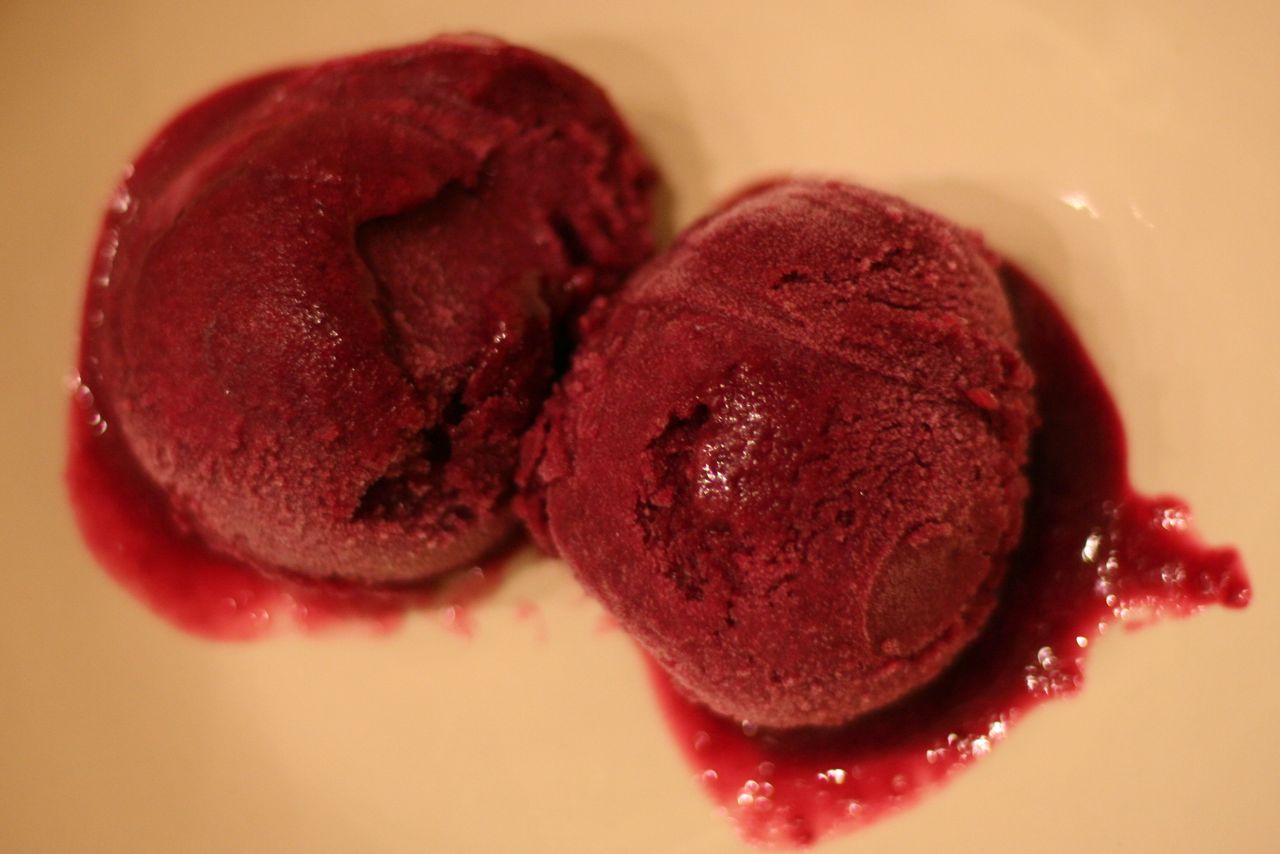
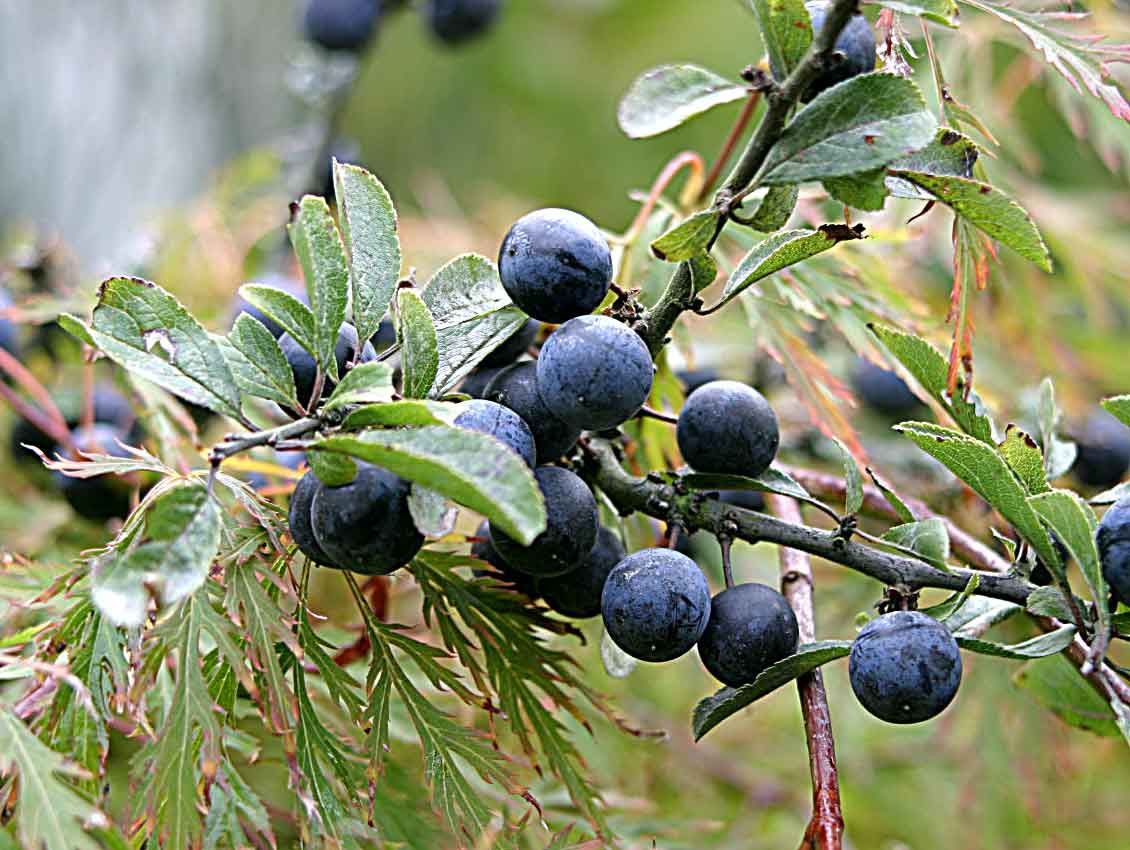
damson sorbetIt’s a great year for plums. They’re literally dripping off the trees, and bumper harvests are even being left to rot on the trees in kent. If plums are booming, that’s certainly also true for their cousins, damsons and sloes, as I discovered on a recent sojourn through the country lanes of Kings Norton. Fortunately I had come prepared with tupperware galore, so filled my boots with plenty of both. The sloes came in handy for my ‘very early sloe gin’, but I was left with a pound or so of damsons – too many to eat, but not enough to make the effort of jam-making worthwhile. Sorbet it had to be then. Many sorbet recipes call for egg white to help keep the smooth texture, but I thought I’d experiment without. It takes a while to complete, so plan to be home for a good 3 hours. If you want a less-involved sorbet, the ‘quick plum sorbet’ from Jamie at Home is good, and would work equally well with damsons. Anyway, here’s what I did…
Ingredients

500g damsons

120g granulated sugar

300ml water

a slug of gin (optional)

Method

Cut the damsons roughly in half, but don’t bother taking out the stones. Put them in a pan with the water and sugar and boil rapidly for 5-10 mins until tender, and the flesh is falling off the stones. Place a sieve over a bowl and pour the pan contents into it. Push the damson-flesh through the sieve with the back of a spoon until you’re just left with a pile of stones and skins. Do this thoroughly, for about 5-7 mins – you’ll notice the difference in flavour. Add the gin, and whack this in the freezer, setting your timer for 30 mins. After 30 mins whisk the mixture like a crazy thing for 30 seconds. Pop back in the freezer and re-set your timer for 30 mins. Repeat as before 3 more times, until you get to 2 hours. After another 30 mins, get an electric whisk out and buzz it for 5 mins on max. Pop back into the freezer and leave for at least an hour before serving.

A delightful early-autumn pud, hope you enjoy it.

Very Early Sloe Gin – Recipe

sloe berriesIt was only after I got back from a long walk out to The Peacock, having gathered a box-full of sloes and with a thirst for G&T, that I discovered in Richard Maybe’s ‘Food for Free’, sloes for making sloe gin are best “after the first frost”. Oh well, I wouldn’t want to see them go to waste, so here is what I did with them…
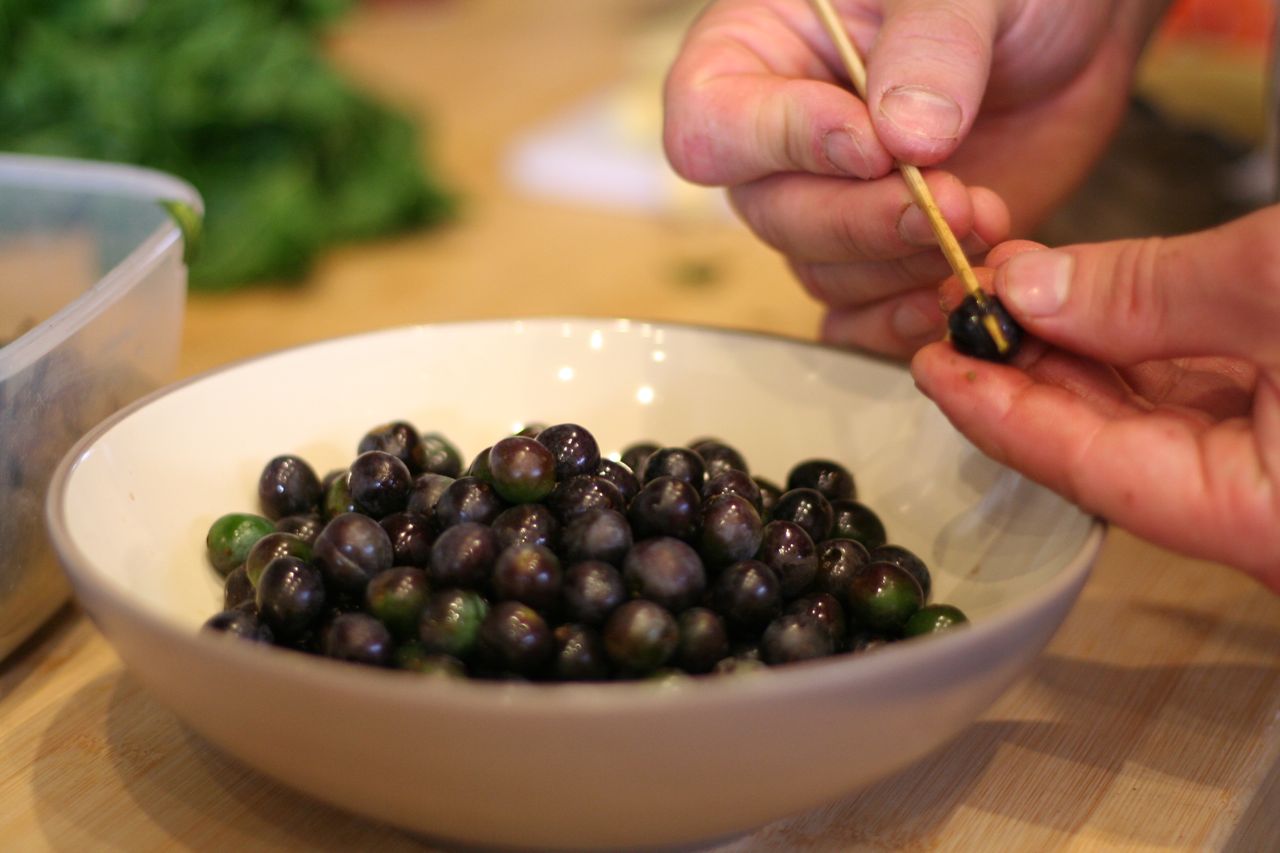

I started by pricking the skins of each sloe with a skewer (a painstaking task with 750g of the things) to mimic the effect that the frost has in breaking the skin open. This will help the gin soak through the sloes and draw out all the flavour.

pricking skins of sloe berries

Next I added to the sloes Continue reading Very Early Sloe Gin – Recipe

In praise of chard! And eggah!

chardI nearly came to blows over chard today. My colleague insisting it was disgusting and that you might as well “eat mud”; me waxing lyrical about the virtues of chard stalks (“the worst bit!”) fried in sage butter.
In a way she was right; for me the beauty of chard is that it does remind me of mud – earthy, minerally, nourishing loveliness. And every bite of the vibrant stalks is a mouthful of sunshine. Argh, how can she not like it?

Plot No. 85 has been producing a lot of the stuff recently, we can’t pick it fast enough, so there’s been a lot of chardy-dinners lately; barbecued marinated stalks at the big lunch on Sunday; pizza Fiorentina yesterday, and tonight, eggah!

eggah

Eggah is a middle-eastern solid omlette/tortilla, perfect for the mezze table, and eaten for hundreds of years to sustain pilgrims on their way to Mecca.

For my eggah, I added the blanched stalks and wilted leaves to some whisked eggs, with a pinch each of salt, pepper, and turmeric, and a sprinkling of chervil, and cooked the whole lot over a low heat in a frying pan for 20 mins – delicious!!! Made with eggs from our hens, and served with sugar snap peas from the lotti, it was virtually a free dinner too.